centos7 中postgreSql主从搭建
ansible安装参考:http://www.duozhi.online/2023/10/19/centos7%e4%b8%adansible%e5%ae%89%e8%a3%85/
1.节点信息
192.168.0.205
192.168.0.206
ansible上的hosts配置
[root@MES-203 ansible]# cat hosts
[k8s]
192.168.0.203 ansible_ssh_user=root ansible_ssh_pass=admin@6129
192.168.0.204 ansible_ssh_user=root ansible_ssh_pass=admin@6129
[pg]
192.168.0.205 ansible_ssh_user=root ansible_ssh_pass=admin@6129
192.168.0.206 ansible_ssh_user=root ansible_ssh_pass=admin@6129
2.关闭防火墙
我是通过203上的ansible操作的
[root@MES-203 ansible]# ansible pg -m shell -a "systemctl disable firewalld&&systemctl stop firewalld&&systemctl daemon-reload"
3.yum 源配置
[root@MES-203 ansible]# ansible pg -m shell -a "mv /etc/yum.repos.d/CentOS-Base.repo /etc/yum.repos.d/CentOS-Base.repo.bak"

[root@MES-203 ansible]# ansible pg -m shell -a "cd /etc/yum.repos.d&&wget -O CentOS-Base.repo http://mirrors.aliyun.com/repo/Centos-7.repo"

[root@MES-203 ansible]# ansible pg -m shell -a "wget -O /etc/yum.repos.d/epel.repo http://mirrors.aliyun.com/repo/epel-7.repo"
4.时间同步
[root@MES-203 ansible]# ansible pg -m shell -a "yum install chrony -y"

[root@MES-203 ansible]# ansible pg -m shell -a "systemctl enable chronyd&&systemctl start chronyd&&chronyc sources"
5.安装pg
5.1下载pg yum源
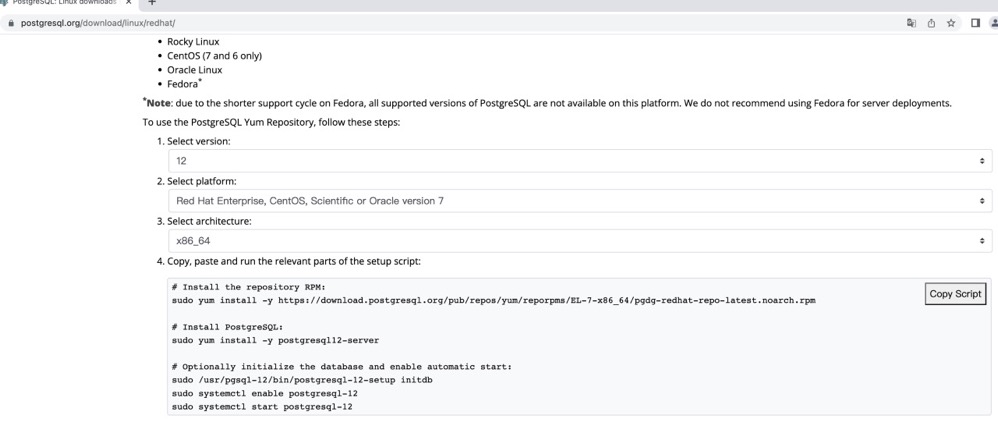
[root@MES-203 ansible]ansible pg -m shell -a "yum install -y https://download.postgresql.org/pub/repos/yum/reporpms/EL-7-x86_64/pgdg-redhat-repo-latest.noarch.rpm"5.2安装
[root@MES-203 ansible]# ansible pg -m shell -a "yum install -y postgresql12-server"5.3初始化db
[root@MES-203 ansible]# ansible pg -m shell -a "/usr/pgsql-12/bin/postgresql-12-setup initdb"5.4设置开机启动
[root@MES-203 ansible]# ansible pg -m shell -a "systemctl enable postgresql-12"5.5开启远程访问(两个节点分别操作)
vim /var/lib/pgsql/12/data/postgresql.conf
修改#listen_addresses = 'localhost'  为  listen_addresses='*'
当然,此处‘*’也可以改为任何你想开放的服务器IP5.6信任远程连接(两个节点分别操作)
vim /var/lib/pgsql/12/data/pg_hba.conf
修改如下内容,信任全部服务器连接并设置密码校验
md5为允许密码验证,trust为免密
用32表示该IP被固定,用24表示前3位固定
# IPv4 local connections:
host    all            all      127.0.0.1/32            trust
host all all 0.0.0.0/0 md55.7修改用户密码(两个节点分别操作)
[root@MESDB-206 data]# sudo -u postgres psql
psql (12.12)
输入 "help" 来获取帮助信息.

postgres=# ALTER USER postgres WITH PASSWORD 'postgres';
ALTER ROLE
postgres=# \q5.8重启(两个节点分别操作)
[root@MESDB-206 data]# systemctl restart postgresql-126.主从配置
6.1主节点
创建用户提供从节点复制流操作
[root@MESDB-205 data]# sudo -u postgres psql
psql (12.12)
输入 "help" 来获取帮助信息.

postgres=# CREATE ROLE replica login replication encrypted password 'rreplication';
CREATE ROLE
postgres=# \q
编辑 pg_hba.conf 追加内容允许从服务器使用replica用户来复制
TYPE      DATABASE      USER            ADDRESS             METHOD
host          replication       replica    192.168.196.130/32         md5
编辑 postgresql.conf 新增或修改下列属性设置
archive_mode = on     # 开启归档
archive_command = 'test ! -f /home/postgresql/archivedir/%f && cp %p /var/lib/pgsql/12/pg_archive/%f'
wal_level = replica
wal_keep_segments = 15
wal_sender_timeout = 60s
max_connections = 100     # 最大连接数,从机需要大于或等于该值
建立归档文件夹
mkdir /home/postgresql/archivedir重启 postgres
systemctl restart postgresql-12从节点206上验证是否可以访问主节点
postgres密码为postgres
[root@MESDB-206 data]# sudo -u postgres psql -h 192.168.0.205 -U postgres
用户 postgres 的口令:
psql (12.12)
输入 "help" 来获取帮助信息.
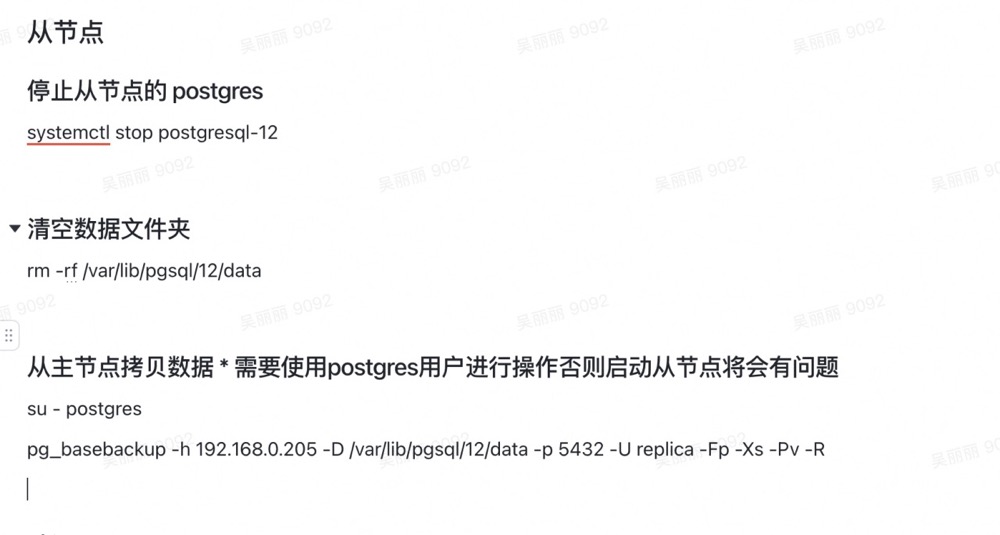
postgres=# 6.2从节点
停止从节点的 postgres
systemctl stop postgresql-12
清空数据文件夹
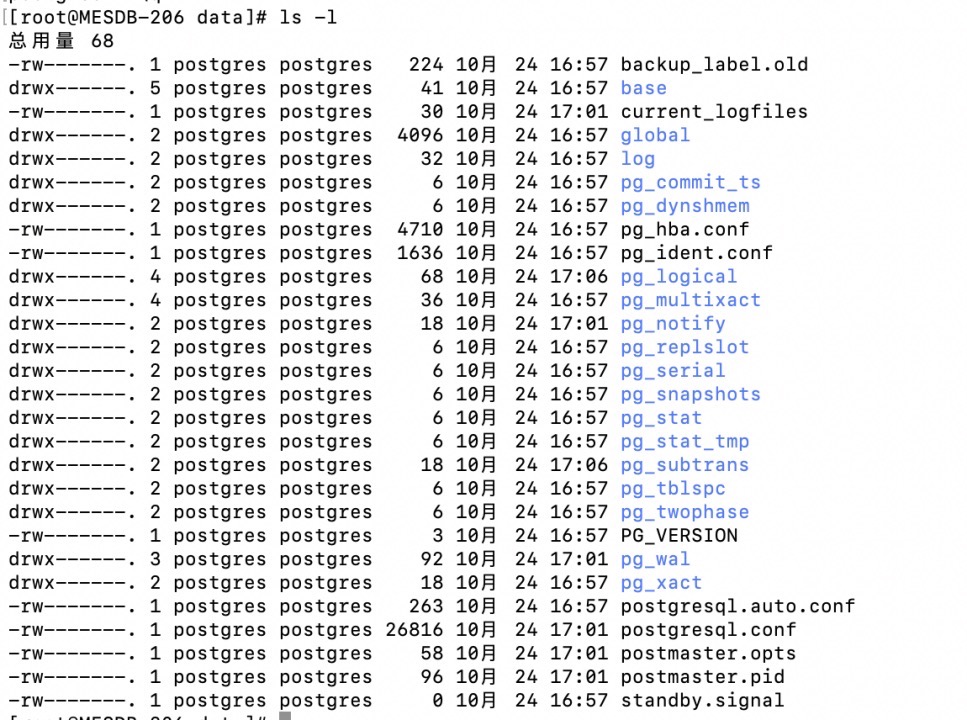
rm -rf /var/lib/pgsql/12/data
从主节点拷贝数据 * 需要使用postgres用户进行操作否则启动从节点将会有问题
su - postgres
pg_basebackup -h 192.168.0.205 -D /var/lib/pgsql/12/data -p 5432 -U replica -Fp -Xs -Pv -R
验证
编辑 postgresql.conf 新增或修改下列属性设置
primary_conninfo = 'host=192.168.0.205 port=5432 user=replica password=replica'
recovery_target_timeline = latest
max_connections = 150     #大于主节点
hot_standby = on
max_standby_streaming_delay = 30s
wal_receiver_status_interval = 10s
hot_standby_feedback = on
重新启动从节点
systemctl restart postgresql-12
6.3验证主从
[root@MESDB-205 data]# sudo -u postgres psql
psql (12.12)
输入 "help" 来获取帮助信息.

postgres=# select client_addr,sync_state from pg_stat_replication;
  client_addr  | sync_state
---------------+------------
 192.168.0.206 | sync
(1 行记录)

postgres=#
postgres=# \q;
主库创建数据库
[root@MESDB-205 data]#  sudo -u postgres psql -U postgres
psql (12.12)
输入 "help" 来获取帮助信息.

postgres=# create database test;
CREATE DATABASE
postgres=#
从库验证
[root@MESDB-206 data]# sudo -u postgres psql -U postgres
psql (12.12)
输入 "help" 来获取帮助信息.

postgres=# \l;
无效的命令 \l;
使用\?获取帮助.
postgres=# \l
                                     数据库列表
   名称    |  拥有者  | 字元编码 |  校对规则   |    Ctype    |       存取权限
-----------+----------+----------+-------------+-------------+-----------------------
 postgres  | postgres | UTF8     | zh_CN.UTF-8 | zh_CN.UTF-8 |
 template0 | postgres | UTF8     | zh_CN.UTF-8 | zh_CN.UTF-8 | =c/postgres          +
           |          |          |             |             | postgres=CTc/postgres
 template1 | postgres | UTF8     | zh_CN.UTF-8 | zh_CN.UTF-8 | =c/postgres          +
           |          |          |             |             | postgres=CTc/postgres
 test      | postgres | UTF8     | zh_CN.UTF-8 | zh_CN.UTF-8 |
(4 行记录)

postgres=# exit
修改默认连接数
[root@MESDB-206 data]# sudo -u postgres psql -U postgres
postgres=#  alter system set max_connections = 2000;
7.授权
grant select on ALL TABLES IN SCHEMA public to user1;
GRANT ALL PRIVILEGES ON TABLE 表名  TO 用户名;
GRANT ALL PRIVILEGES ON DATABASE 数据库名 TO 用户名;

grant ALL PRIVILEGES  on ALL TABLES IN SCHEMA public to stage_dev_zhao;
参考文献
https://www.postgresql.org/download/linux/redhat/
https://blog.csdn.net/zbdaowohao/article/details/105218287
创建用户
https://blog.csdn.net/Rong_Toa/article/details/88917424

授权
https://www.cnblogs.com/lottu/p/12916046.html
问题处理
修改了从库配置,从库起不来了
把下面的操作重新操作一遍吧
版权声明:原创作品,允许转载,转载时请务必以超链接形式标明文章 原始出处 、作者信息和本声明。否则将追究法律责任。
转载请注明来源:centos7 中postgreSql主从搭建 - 多知在线